
Other chapters in this series:
Cut-Over Plan Best Practices for Go-Live Success
Welcome to part two of our Go-Live Success blog series! In this section we will cover how to best manage inventory balances when cutting over in NetSuite.
When establishing opening balances, it is recommended to set up your inventory first before A/R and A/P. This will allow you to monitor your inventory balances as new orders are processed and shipments are received in NetSuite. Preparing the initial inventory adjustments in NetSuite will largely depend on your current ERP system or inventory management system and how well you can track your inventory quantities and valuations.
The basic process is as follows:
- Setup item master
- Export inventory information from current system per location
- Import inventory quantities and valuations
- Physical inventory count
- True-up inventory and post adjustment amount
At this point in the process, your item master should be completed in NetSuite and mapped to the item records in your existing inventory system. Additionally, there should be locations set up in NetSuite for each location that holds inventory and set with the "Make Inventory Available" enabled. The next steps will depend on whether or not inventory quantities and costs are currently tracked.
The most direct way of establishing inventory levels in NetSuite is to import an Inventory Worksheet, which will immediately set your current inventory levels to what is entered on the worksheet. This is fairly straightforward to set up: all that is required is the item name, quantity, and value per location.
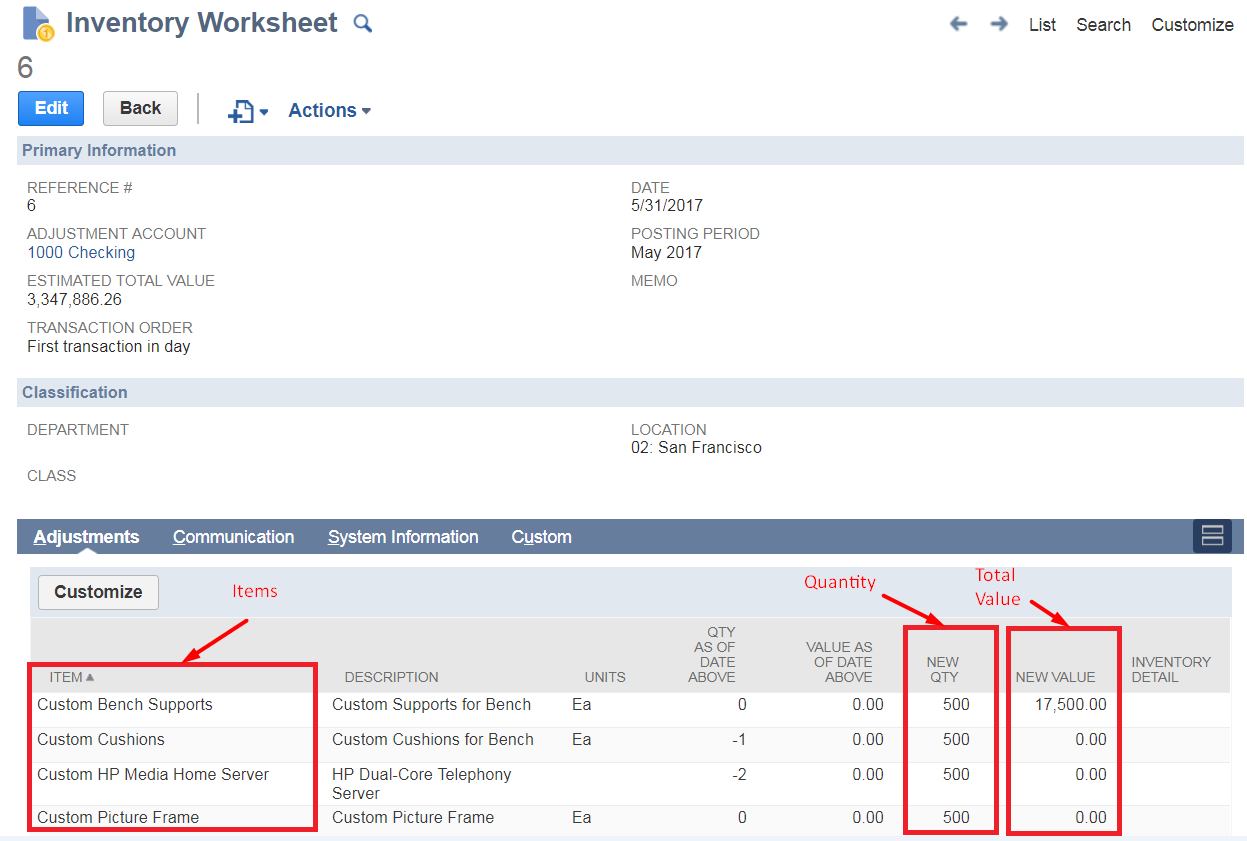
The main consideration here is the inventory costing method, as inventory worksheets will value your inventory with an average cost per unit. Even if you use a FIFO/LIFO costing method, and NetSuite inventory items are configured to use a FIFO/LIFO costing method going forward, it is best practice to use the average cost because of the simplicity in setting up your current inventory status.
From a business process standpoint, you could treat this as a one-time inventory revaluation exercise which is required in switching ERP systems.
Additionally, it can be very labor intensive to find the correct inventory cost buckets when using FIFO/LIFO, and there is usually very little benefit in carrying this level of detail over.
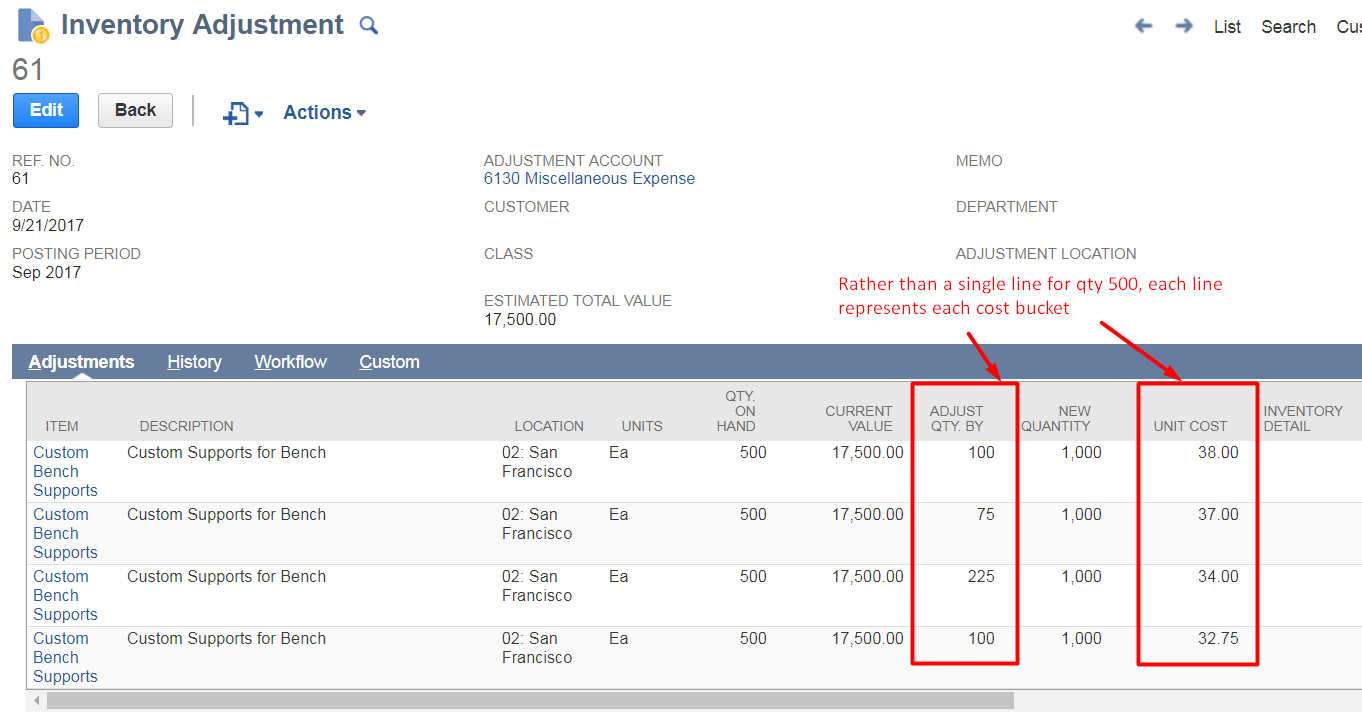
Nonetheless, if preserving the FIFO/LIFO cost buckets is a major requirement, you would do so by utilizing a series of inventory adjustments instead, which will be more complex, time intensive and prone to error.
Assuming you have calculated the correct inventory valuation buckets as it pertains to FIFO/LIFO, you would structure your inventory adjustment like this:
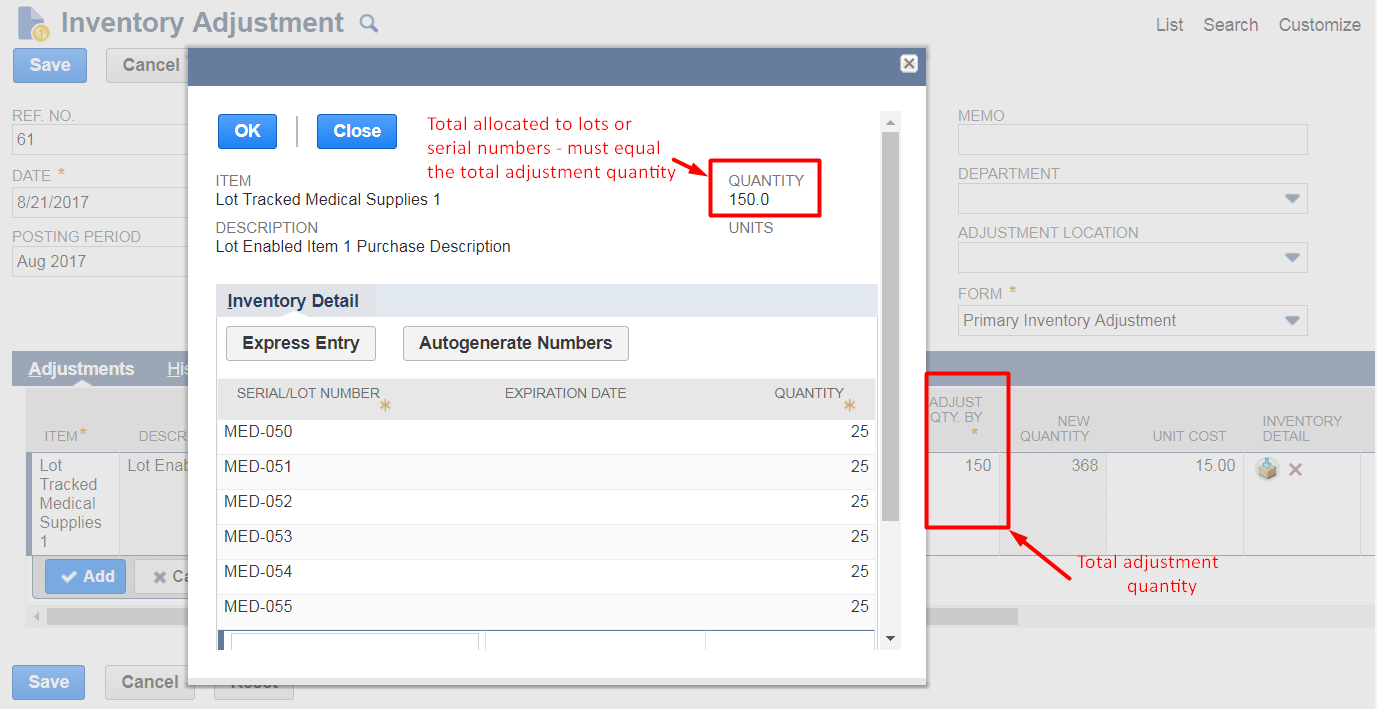
The other consideration to using inventory worksheets are the item types. If lot-numbered and/or serialized items are being used, then you MUST use inventory adjustments. For each line item on the inventory adjustment, you must reallocate the total quantity to their respective lots or serial numbers. Structuring your inventory adjustment file would look like this:
Lastly, if bin management is enabled for items, the bin number(s) associated with each item will have to be entered. Similar to entering serial or lot numbers, the quantity breakout for each bin number will need to add up to the total adjustment quantity.
Fortunately, you can select bins on inventory worksheets (for standard inventory and assembly items) and on inventory adjustments (for serial and lot-numbered items). However, the bin numbers have to be created ahead of time either manually or via another CSV import. An error will occur if a bin number that does not exist is used.

Note that there is also the option of using vendor bills to establish inventory, which used to be the recommendation because inventory adjustments could not be imported with a CSV file.
However, since the NetSuite 2016.2 Release, support for CSV imports of inventory adjustments has been included. Since then, there has been no need to use vendor bills, as inventory adjustments provide a much cleaner approach to establishing inventory.
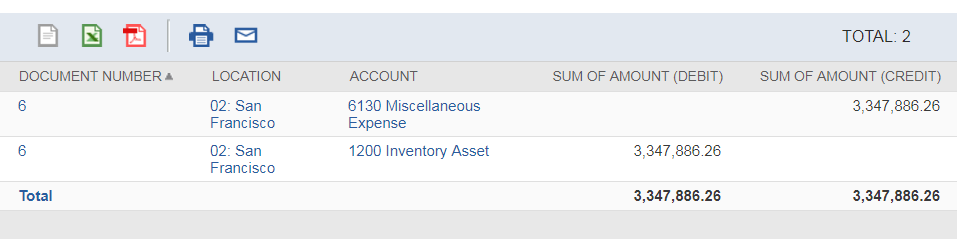
Once all inventory transactions have been posted, a Journal Entry must be created to negate the impact of the worksheet. The best method of calculating the journal is to use a summary saved search to aggregate all the debit and credit amounts for all inventory worksheets/adjustments entered. Once the total GL impact is calculated, entering the offsetting journal is simply a matter of reversing the impact of the saved search results.
It is highly recommended to perform a physical inventory count to true-up your inventory levels in NetSuite. It's best to schedule this count during a time where you can minimize the impact to your physical inventory, such as after work hours when your staff isn't picking items off the shelf to ship out or receiving incoming inventory.
Alternatively, a temporary hold can be applied to all orders from being fulfilled or received, so that your staff can dedicate a whole day to count the inventory. If it’s not feasible to temporarily stop business activity, inventory could be counted over several days, with a focus on items that have a lot activity and require the most accurate counts.
If inventory isn’t effectively tracked, it is recommended to perform a physical inventory count before managing inventory in NetSuite. It’s also recommended to work with your accounting team to establish the best method for the initial inventory valuation.
The goal is to substantiate the book value of your inventory and to write off the variance between the current book value and the value of the inventory based on the physical count. Because this variance can be quite significant, it’s important to include key stakeholders when discussing the accounting impact of this type of transaction.
When inventory is established in NetSuite, all transactions that affect your inventory quantities, such as fulfilled orders, should be entered. If inventory balances were imported prior to the go-live date, all orders leading up to the go-live date should be entered to ensure the accuracy in NetSuite (even if it means temporarily running your existing system and NetSuite simultaneously).
Stay tuned for part three where we will discuss open A/R!
Talk to a NetSuite Expert
Tell us what you're working on, and we'll help you figure out the next step.