As you may be aware, NetSuite released two-factor authentication (2FA) for highly privileged administrative permissions back in the 2018.2 release. This extra layer of authentication security, now (4/8/2019) enforced in all NetSuite accounts, is focused around increasing account security and had a widespread impact on user experience and integration on the platform. In this article, we will take a deep look inside the 2FA setup and its impact. We will also explore the latest ways to bypass 2FA requirement. We then will walk through detailed steps for setting up 2FA for those new to NetSuite. At the end, we will discuss dealing with 2FA in special circumstances.
What is 2FA?
Two-factor authentication (2FA) allows enforcement of a second level of security for logging in to the NetSuite user interface. Using 2FA can protect your company from unauthorized access to data (NetSuite). With 2FA enabled, a user will have to provide a verification code that will be generated dynamically in additional to email address and password to gain access to NetSuite from the User interface, integration and other contexts.
Effective Dates
Starting on April 8th 2019, all production accounts will have mandatory 2FA enforced for Highly Privileged Roles. This means any integrations using these roles will no longer work after 4/8/2019. Account owners and NetSuite partners received a reminder email from NetSuite on 3/26/2019.
2FA will be enforced for any SDN accounts (leading and trailing) newly provisioned starting from version 2018.2 phase 1. All existing SDN accounts provisioned prior to NetSuite version 2018.2 phase 1 will NOT have 2FA enforced.
Enforced 2FA on Highly Privileged Roles/Permissions
Although 2FA feature can be turned off for most of roles, NetSuite enforces 2FA on Highly Privileged roles/permissions even with 2FA Authentication Required option turned off on those roles. This is to prevent Highly Privileged roles being used in unauthorized access to your account.
As far as we discovered, the following default roles will have 2FA enforced:
- Administrator
- Full Access
- Developer (2019.1 feature)
- Marketing Administrator
- Sales Administrator
- Support Administrator
- System Administrator
According to NetSuite, any roles (custom or default) with following permissions will have 2FA enforced:
- Access Token Management (for Token-based Authentication)
- Core Administration Permissions
- Two-Factor Authentication base
- Set Up OpenID Single Sign-on
- Set Up SAML Single Sign-on
- Integration Application
- Device ID Management
2FA on Regular Roles
2FA feature can be turned on roles that do not have 2FA enforced for security needs. User can set the duration of trusted device. User can login without verification code within the set duration period if login is from the same machine (IP address). After the period, user will have to enter the verification code again.
Impact of this Change
- It may be more annoying to the end user if not following best practices with roles/permissions.
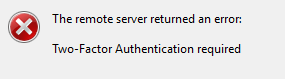
- Integration using credential-based authentication can no longer use the Administrator role. Custom roles should be created for integrations to follow best practices by granting minimum permissions required to interface with records and objects in NetSuite. (2FA is not compatible with web services or SuiteAnalytics Connect. To use web services or SuiteAnalytics Connect, you must be logged in with a role that does not require 2FA. If you want to use RESTlets or web services with a highly privileged role, use Token-based Authentication. - NetSuite)
- SDF developer needs to set up a custom role to pull objects from NetSuite
- Developers will have to create a custom role if a team is using the same credential for development to avoid verification
How To Navigate Around 2FA
Let’s face it, sometimes added security can add an additional burden. Here’s a few of our best practices you may want to employ to best deal with 2FA.
- User Interface: To avoid entering verification code every time logging into NetSuite using Admin role (or similar roles), user can check the trust device for 30 days to stay verified over at least 30 days.
- Integration: Create new role following best practices for integration roles instead of using Administrator and other highly privileged roles.
- Integration: Use TBA instead of credential-based authentication. TBA will never expire even with change of user password. Due to that fact, it is a recommended method to access NetSuite for integrations. For more information regarding TBA method, check out our Guide to Using Token Based Authentication in NetSuite by Luke Pirtle.
- Administrator: Need to ensure you don’t add 2FA Permissions to a role that does not need it.
- Developer: Create a custom developer role from default Developer role (2019.1 feature). Unfortunately, the default Developer from 2019.1 enforces 2FA. However, it is still possible to utilize this role with some modification.
- First the SDF feature must be enabled under Setup -> Company -> Enable Features -> SuiteCloud -> SuiteCloud Development Framework
- Go to Setup -> Users/Roles -> Manager Roles, the click Customize on Developer role (Role Internal Id: 55)
- Rename the custom role, and remove Integration Applications and Access Token Management from permission
- Assign the custom Developer role to users


How to Setup Two-Factor Authentication
On the initial log in, NetSuite will send a security code to the shared users email address. You will have the ability to skip setting up the 2FA process a few times before it becomes required to access the account. We would recommend setting up 2FA on the first log in since you will have eventually set it up anyway.
Once you have entered the emailed security code, you will be presented with the Security Setup page. Here we will select the Authenticator app option and click the Next button.
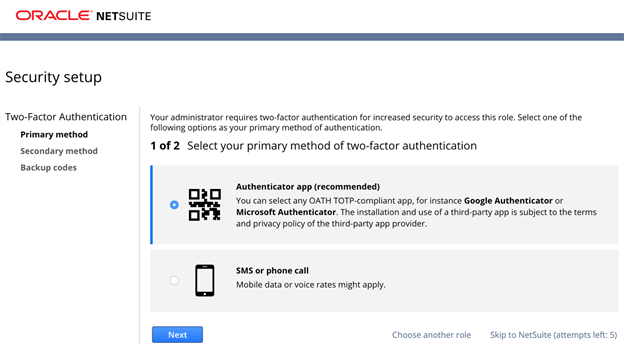
Using the authenticator app option has been the simplest and quickest way to get multiple users setup with 2FA. NetSuite will provide you with a three-step process page, which contains a QR code. Scan the QR code with an authenticator app of your choice and enter the number generated by the app to verify your primary 2FA method.
Currently NetSuite supports the following 3rd Party authentication applications:
- Google Authenticator
- Microsoft Authenticator
- OKTA Verify
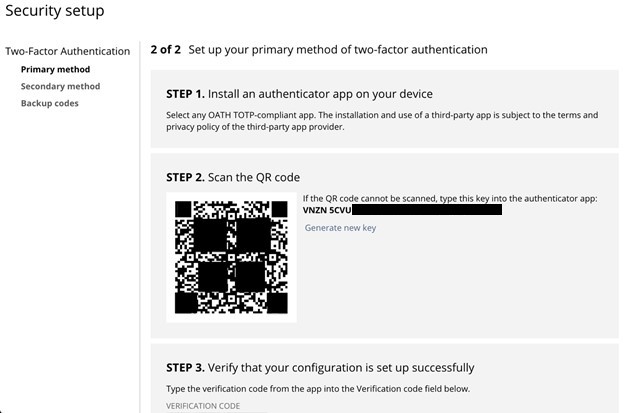
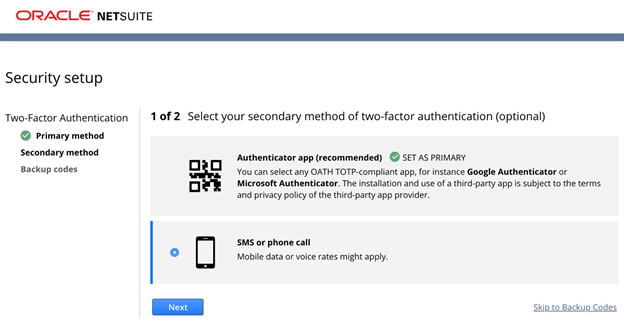
Users can store the screenshot of QR code in a safe place for any new users that require access to the account via the shared email. If the account is primary for personal use. User can also add phone number as secondary method of 2FA to receive verification code via SMS/Phone Calls for added security.
Once on the backup codes page user can take note of the code physically or via screenshot instead of saving the code in text format to reduce risk of security breach. Please note that one security code can only be used one time. If all security codes have been used, user will have the ability to generate another set of codes.
User Login
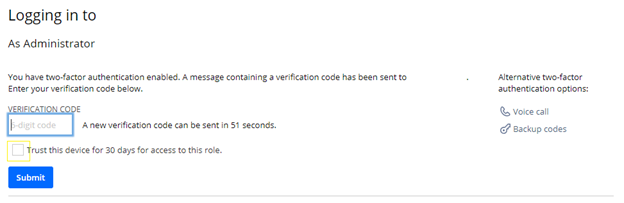
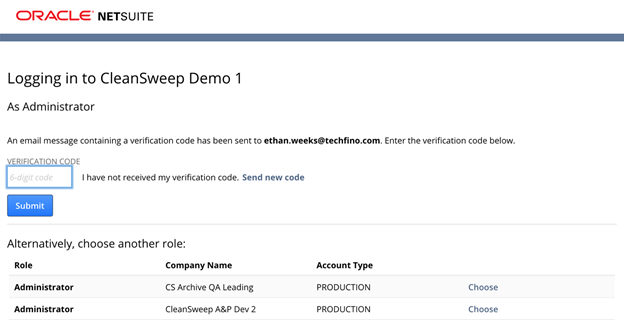
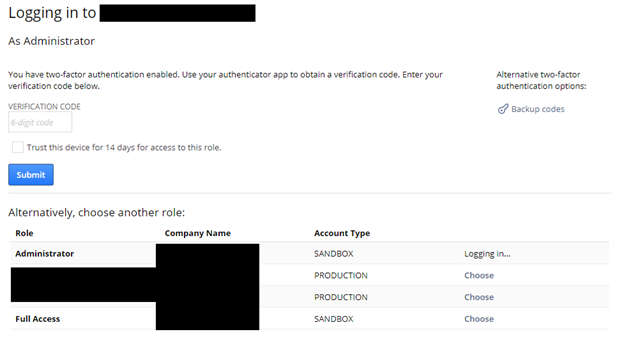
After 2FA is setup, the user will have to enter the verification code on their next login via the interface shown below. To login with a highly privileged role, a user must enter the 6-digit code from authenticator before the timer runs out. If a mobile phone is added as a method for a 2FA user, they can enter the code received by SMS before it expires (one minute). As an alternative, the user can enter the 8-digit backup code after clicking on the backup codes button shown in the top right corner of the login screen.
2FA Reset
This rarely happens, but in the case of switching to a new phone, changing the number or running out of backup codes, a NetSuite user can reset their 2FA Setting/Backup Codes after logged into NetSuite by navigating to the Settings portlet located on the home dashboard.
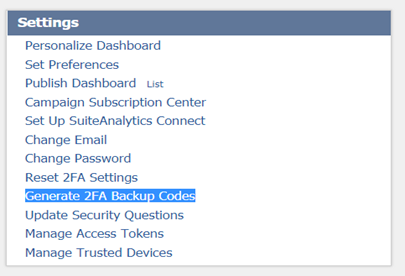
Users can do one of the following:
- Click Reset 2FA Setting and follow the steps to restart with the 2FA setup process. Once reset, the previous 2FA setting can no longer be used to access NetSuite.
- Click Generate 2FA Backup Codes and follow the steps to generate another set of backup codes. Any codes generated previously can no longer be used to access NetSuite.
Shared Access Considerations
For NetSuite Solution Providers and integration accounts, it is likely that one access (for example xxxxx@techfino.com) might be used by multiple people for administration. In this scenario, users have the following options:
- Do not add phone number to 2FA method since this will only allow one user to get access to verification code.
- Store a screenshot of QR code and use that for setting up 2FA for all people that use the account. The QA code for authenticator does not change unless one of the users reset 2FA setting
- Store backup codes and share with teammates. Use the Trust this device for 30 days for access to this role option to keep access. If all backup codes have been used, generate another set.
We must mention that shared access will dramatically increase the chance of security breach. Avoid shared access when possible.
Storing User Credentials
We like to use LastPass to store credentials. It is a free and safe application. User can store all credentials in one place and use it across multiple browsers once the desktop version is installed. It can store multiple credentials for one site vs Google Chrome’s one credential only for one domain. It is also possible to share credentials without exposing the password.
There is also a way to share 2FA verification (to avoid 2FA setup headache)
- Create a Google folder QR Code and only allows team members to access this folder.
- Upload the 2FA QR Code to QR Code folder
- In the notes section in LastPass paste in the link to the Google file
- If you share the access with somebody else, they will be able to see the QR code link from the notes section
Talk to a NetSuite Expert
Tell us what you're working on, and we'll help you figure out the next step.